You may have a circuit breaker from Minn Kota because you like that it’s a trusted brand. But the necessary work doesn’t end after you find the right equipment. You must also finish the Minn Kota circuit breaker installation. To obtain protection for your boat motor, you have to assemble the parts properly.
Besides availing protection, adding a circuit breaker is a requirement imposed by ABYC or American Boat & Yacht Council for the sake of safety. Also, the Coast Guard dictates that users must be able to manually test their breaker or fuse. It should be trip-free and appropriate for your trolling motor. To keep up with these regulations and guarantee your safety, let this article guide you with the installation.
Table of Contents
Before you start the installation of the Minn Kota trolling motor circuit breaker, you have to make sure that you have the proper equipment for your boat. Double-check the following components:
Before you go over the sizing chart, you have to keep these things in mind.
The wire size or extension length is the distance between the trolling motor and the batteries.
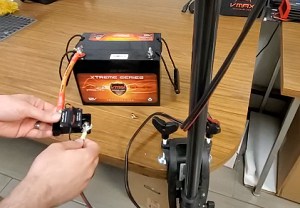
Minn Kota produces circuit breakers for their trolling motors. It’s an effort to achieve the expected result. Nevertheless, the battery contributes to making things work. A trolling motor from Minn Kota can operate with 12V deep-cycle marine batteries composed of lead acid. The best one to choose is the one with an hourly rating of 100 amperes. You may have this as a reference when wiring Minn Kota trolling motor.
| Run-time | Voltage | Group Size | Amp-hour |
| Best | 12 | 31 | 95 to 125 |
| Better | 12 | 27 | 85 to 110 |
| Good | 12 | 24 | 70 to 85 |
Additional Tips When Getting Batteries for Your Trolling Motor
Precautions
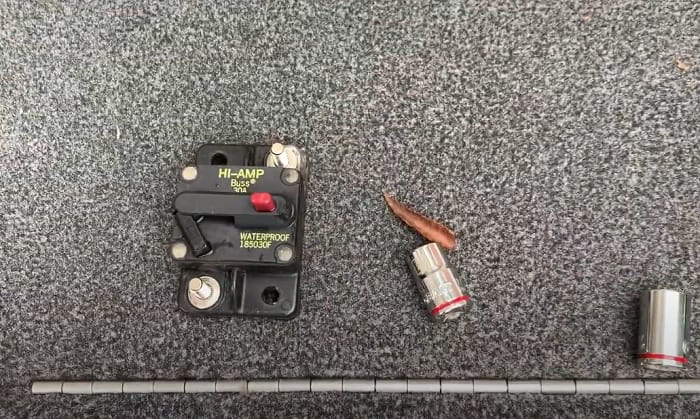
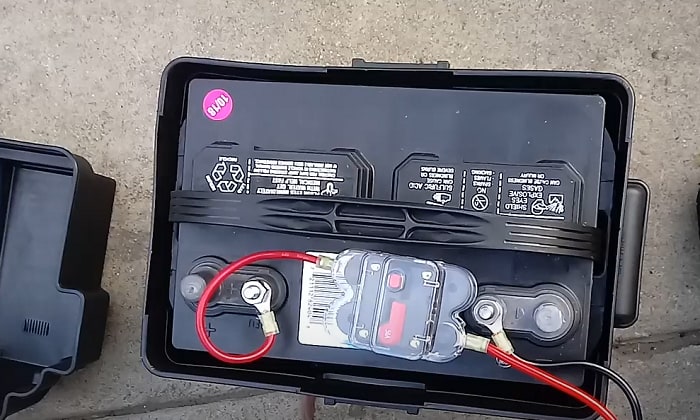
Trolling motor circuit breaker installation starts with making sure that you have the necessary parts. You’d prefer to continue working rather than pause to find what you need. The Minn Kota wiring system mainly includes the following:
Apart from these components from the Minn Kota wiring kit, you will need these:
Don’t be impatient if I tell you that you may need to get additional parts. Once you’re done with the correct installation, there’s an assurance that your trolling motor is protected. The exchange for hard work is beneficial in the long run.
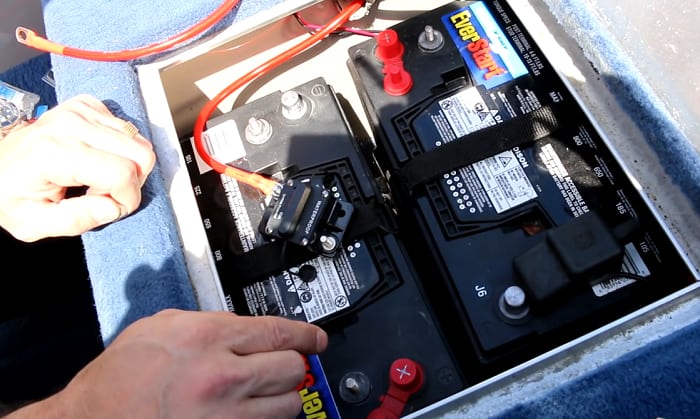
After a long way, the installation is discussed in this part. First, it’s with the trolling motor and batteries. Check the positive and negative sides of the battery so you can attach the leads properly. The black part is positive and the negative side is red.
The 12V trolling motor usually weighs 22 lbs or less and should be linked with the positive terminal while the lead is on the negative side. 24 volt and 36-volt trolling motors need a series of batteries. After this step, here are the installation procedures of a circuit breaker from Minn Kota.
The Minn Kota circuit breaker installation is not only about the proper steps. You have to be careful in choosing the type of breaker, wires, and other components. These things should be compatible with your trolling motor. If they’re not the right ones, you’ll fail to make the circuit breaker work in protecting the trolling motor.